
Taro Ice Cream: A Creamy, Nutty Delight You Need to Try
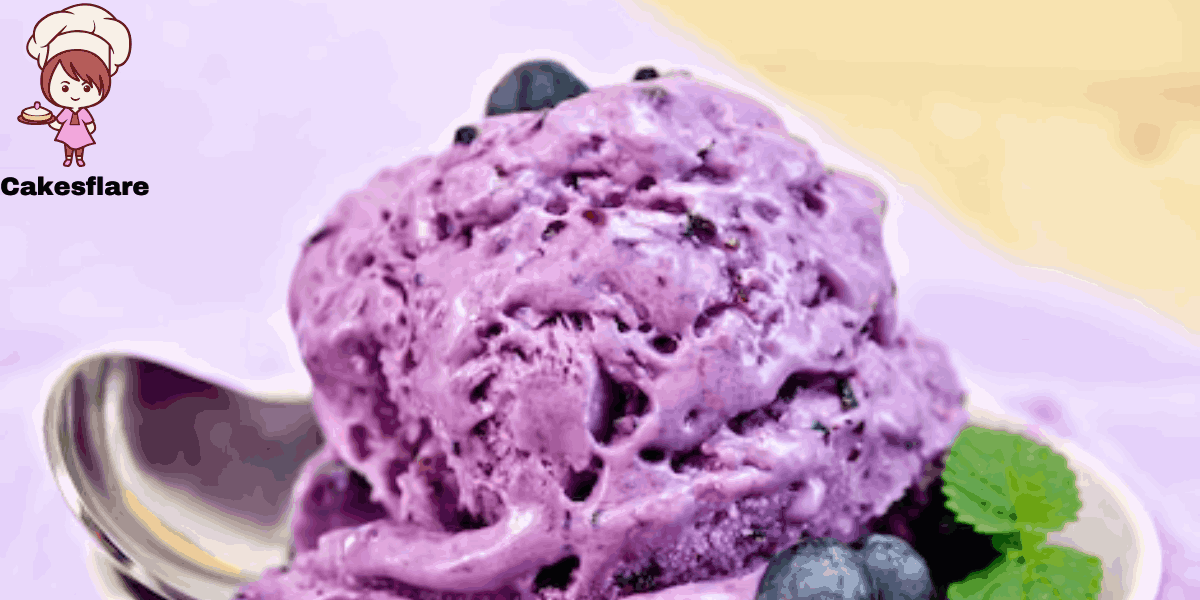
Taro ice cream is a deliciously creamy dessert with a nutty and mildly sweet taste, made from taro, a starchy root found in tropical regions like the Philippines. It has a smooth, rich texture, thanks to taro’s natural starchiness and the addition of coconut cream.
This homemade taro ice cream is easy to make using a no-churn method or an ice cream machine. While taro powder is a convenient alternative, fresh taro gives the ice cream a more authentic flavor and a naturally earthy, vanilla-like aroma.
A naturally purple, creamy, and refreshing delight, this is a must-try ice cream flavor if you’re searching for something new and unique!
💜 Why You’ll Love This Homemade Taro Ice Cream Recipe
✔ Unique Flavor
Taro ice cream has a slightly sweet, nutty, and earthy taste with hints of vanilla and coconut, making every bite memorable.
✔ Creamy & Smooth Texture
The combination of taro paste, coconut cream, and heavy cream creates an irresistibly rich and velvety consistency.
✔ All-Natural Ingredients
Unlike store-bought ice cream, this recipe is free from artificial preservatives and colorings while staying true to taro’s natural goodness.
✔ Nostalgic & Fun to Make
For many, taro ice cream brings back childhood memories or introduces a new cultural experience. Whether you’re making it for fun or as a special treat, this ice cream is a must-try!
🍦 Essential Ingredients for Creamy Homemade Taro Ice Cream
Main Ingredient
- 500g fresh taro root, grated (for authentic flavor)
Dairy & Cream Base
- 2 cups heavy cream (for a creamy texture)
- 300ml condensed milk (adds sweetness)
- 1 can (14 oz) coconut milk (enhances richness)
- 1 cup full-fat cream (improves consistency)
Sweeteners & Flavor Enhancers
- ¾ cup sugar (adjusts sweetness)
- ½ teaspoon kosher salt (balances flavor)
- ½ cup taro powder (optional for deeper color & taste)
Texture & Binding Agents
- 2 tbsp unsalted butter (for smoothness)
- ¼ cup soymilk or regular milk (to adjust consistency)
🥄 Step-by-Step Guide: How to Make Taro Ice Cream at Home
Step 1: Preparing the Taro Mixture
In a heavy-bottomed saucepan over medium heat, melt the butter. Add the grated taro when the butter has melted and the froth has subsided. Stir well, coating the taro in butter, and cook for 3–5 minutes until it turns translucent and slightly golden on the edges.
The taro will soften and reduce volume as it cooks, turning into a thick, starchy mixture. Using a wooden spoon, scrape up any starchy bits from the pan.
Add the coconut milk, heavy cream, and sugar, stirring gently to combine. Bring the mixture to a low simmer, then cover the saucepan and cook for about 20 minutes or until the taro is entirely soft and slightly purple-grey.
Step 2: Blending & Chilling the Ice Cream Base
Carefully transfer the warm taro mixture into a blender. Blend on high speed for about 30 seconds until it becomes completely smooth and creamy.
💡 Tip: To prevent pressure buildup, remove the plastic knob from the blender lid and cover the hole with a paper towel while blending.
Pour the mixture into an airtight container after straining it through a fine-mesh sieve. To improve the flavour, add a sprinkle of salt and stir. Then, chill for at least 4 hours or until completely cooled.
Step 3: Churning and Freezing the Ice Cream
Pour the cold ice cream base into an ice cream machine and churn it as directed by the manufacturer. Before serving, move the churned ice cream to a freezer-safe container and freeze it for at least six hours.
💡 For an extra smooth texture, chill the heavy cream and coconut milk before using them.
Step 4: Serving & Enjoying
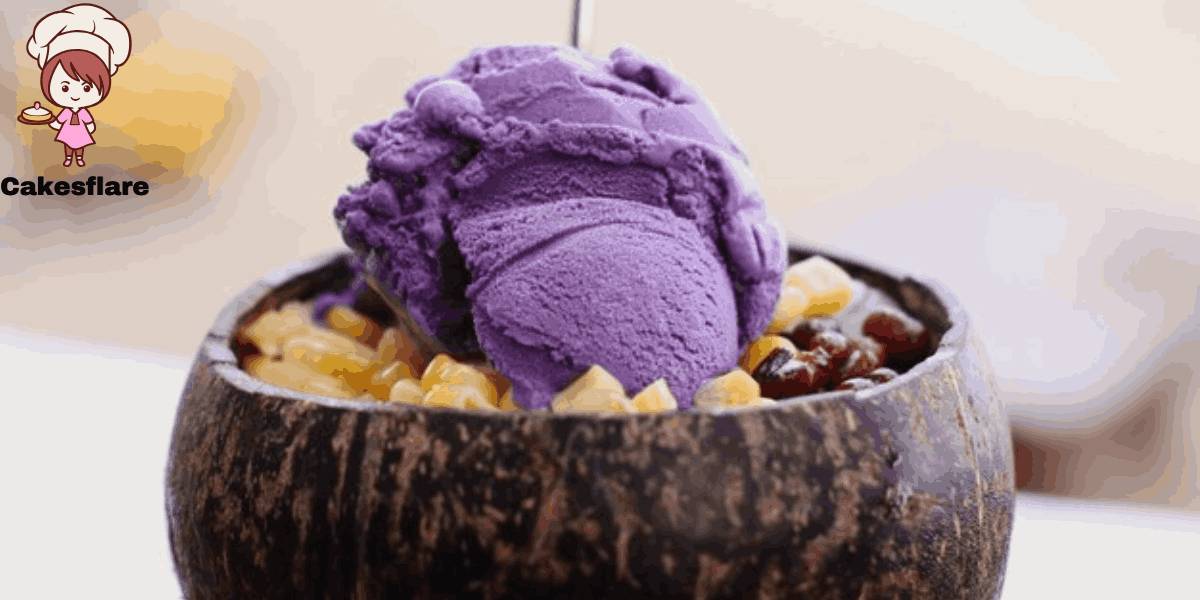
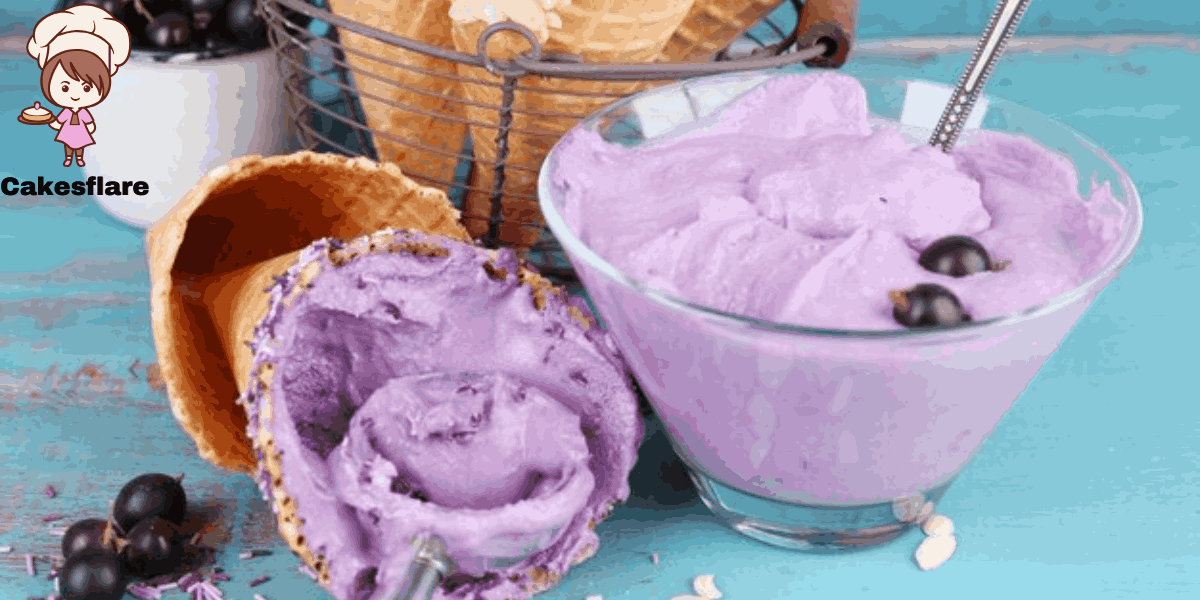
Transfer the taro ice cream into ice cream cones or bowls using a spoon. Add some chopped almonds, salted peanuts, or chewy boba pearls for texture.
🥶 How to Store Taro Ice Cream for Maximum Freshness
To avoid freezer burn, move the ice cream to an airtight, freezer-safe container.
✔ Best Quality: Consume within 2–3 months.
✔ Longer Storage: To avoid ice crystals, press a sheet of plastic wrap straight over the surface before closing.
🔍 Frequently Asked Questions (FAQs)
Q: Can I use taro powder instead of fresh taro?
Yes! Taro powder is convenient and gives a consistent purple color, but fresh taro offers a more natural, nutty taste and creamier texture.
Q: Why is my taro ice cream not creamy?
For a smoother texture, chill the ice cream base properly before churning. Using full-fat coconut milk and heavy cream also prevents iciness.
Q: Can I make taro ice cream without an ice cream maker?
Yes! Use the no-churn method by blending the ice cream base, pouring it into a container, and freezing it. Stir every 30 minutes for the first 3 hours to prevent ice crystals.
Q: How can I enhance the flavor of taro ice cream?
Adding vanilla or a small amount of purple yam (ube) extract can boost the flavor and create a richer taste.
Q: What toppings go well with taro ice cream?
Taro ice cream pairs well with boba pearls, toasted coconut flakes, mochi, honey, or crushed cookies.
Q: Can I use other plant-based milk instead of coconut milk?
Yes! While coconut milk adds richness, you can substitute it with almond, oat, or cashew milk for a lighter version. Remember that the texture may be slightly less creamy, so using full-fat plant-based dairy is recommended.
Q: What can I serve with taro ice cream?
Taro ice cream pairs well with Asian desserts like boba tea, mango sticky rice, or mochi. You can also serve it in a waffle cone, drizzle it with honey, or enjoy crushed graham crackers or caramel sauce for extra sweetness.
🍽 Final Thoughts – Try This Delicious Taro Ice Cream Recipe!
Taro ice cream is a one-of-a-kind dessert that combines earthy, nutty, and creamy flavours in every bite.This simple homemade recipe is worth trying whether you enjoy traditional ice cream flavours or are searching for something novel and interesting!
📢 Share Your Experience & Stay Connected!
Have you made this homemade taro ice cream? Let us know in the comments below! 📸 Tag us on social media with your taro ice cream creations—we’d love to see them! Remember to forward this recipe to loved ones who enjoy unusual frozen desserts!
Taro Ice Cream recipe
Equipment
- Heavy-bottomed saucepan
- Wooden spoon
- Blender
- Strainer
- Airtight container (for chilling and storing)
- Ice cream maker
- Freezer-safe container (for storing after churning)
Ingredients
- 500 grams – Grated taro for its signature taste
- Dairy and Cream Base
- 2 cups – Liquid ingredients for a creamy texture
- 500 ml – Whipping cream
- 300 ml – Condensed milk
- 14- ounce can – Coconut milk
- ⅔ pound – Heavy cream
- 1 cup – Full-fat cream
- Sweeteners and Flavor Enhancers
- ¾ cup – Sugar to enhance flavor
- ¾ teaspoon – Adjusts taste
- ½ teaspoon or 1/4 tsp – Kosher salt or regular salt
- Texture and Consistency Boosters
- ½ cup – Taro powder for a rich texture
- 4-6 tbsp or 2 tbsp – Liquid adjustments for consistency
- Fats and Binding Agents
- 2 tablespoons – Unsalted butter or butter for smoothness
- Liquid Adjustments
- ¼ cup – Soymilk can be substituted
- Milk – Used to adjust consistency
Instructions
- Preparing the Taro Mixture
- Melt butter in a saucepan over medium heat.
- Add taro and stir until coated with butter.
- Cook until translucent and slightly golden.
- Scrape off starchy bits from the pan.
- Pour in cream, coconut milk, and sugar.
- Simmer on low heat, then cover.
- Cook until taro softens (about 20 minutes).
- Blending and Chilling
- Transfer mixture to a blender.
- Blend on high for 30 seconds until smooth.
- Use a paper towel to cover the blender lid opening.
- Strain into an airtight container.
- Add salt to taste.
- Refrigerate for at least 4 hours until chilled.
- Churning and Freezing
- Pour chilled mixture into an ice cream maker.
- Churn following manufacturer’s instructions.
- Transfer churned ice cream into an airtight container.
- Freeze for at least 6 hours before serving.
- Pre-chill cream and milk for a smoother texture.
- Serve in bowls or cones with toppings like nuts or boba.
- Storing Taro Ice Cream
- Store in a freezer-safe, airtight container.
- Seal tightly to prevent freezer burn.
- Keep frozen for up to 2-3 months.
- Ensure minimal air exposure for best freshness.
- Enjoy anytime within the recommended shelf life.
Notes
This ice cream is free from artificial preservatives, making it a healthier alternative to store-bought options.
It’s a great treat for those who enjoy trying new, exotic flavors.

47 Responses
Производство светодиодных светильников с возможностью управления через смартфон
светотехника в москве купить https://www.proizvodstvo-svetodiodnih-svetilnikov.ru .
Прайс-лист на услуги сантехника в СПб – доступные цены и скидки
сантехнические услуги цена remont-santehniki-price.ru .
Сантехник СПб – прайс и скидки на все виды работ
цены на услуги сантехника https://www.santeh1-montazh-price.ru/ .
Лучшая мебель для кафе – большой выбор, быстрая доставка и низкие цены
ресторан мебель http://mebel-dlya-kafe.ru/ .
Профессиональная разработка ППРК с учетом специфики высотных работ
ппр на работу автокрана http://www.pprk-msk.ru .
Профессиональный клининг Москва: рейтинг специалистов для сложных задач
лучший клининг в москве https://kliningovye-kompanii-msk.ru/ .
Прямые маршруты и комфортные отели — отдых в Абхазии без стресса
абхазия отдых 2025 https://otdyhabhazia01.ru/ .
Рейтинг компаний Москвы по уборке с оценкой оборудования и технологий
клининговая компания в москве http://www.kliningovye-kompanii-msk1.ru/ .
Поверка манометров с выездом — удобное решение для бизнеса
поверка манометра с выездом на объект http://www.poverkamanomterov.ru/ .
Платная клиника наркологической помощи с лечением на дому и в стационаре
клиника алкоголизма platnaya-narkologicheskaya-klinika-0.ru .
Услуги сантехника для новостроек, старого фонда и коммерческой недвижимости
вызов сантехника московский район на дом vyzov-santekhnika-0.ru/moskovskij-rajon .
Услуги сантехника для аварийных ситуаций и экстренного ремонта
вызов сантехника на дом https://www.vyzov-santekhnika1-spb.ru .
Установка пластиковых окон зимой — быстро, выгодно, удобно
пластиковые окна монтаж https://plastikovye-okna-master.ru .
Новейшие методики и международные стандарты — психиатрическая клиника СПб
психиатрическая клиника спб https://klinika-psikhiatrii-spb.ru .
Этапы медицинского вывода из запоя в домашних условиях
анонимный вывод из запоя https://vyvod-iz-zapoya-spb-1.ru .
Продажа каркасных домов с индивидуальной планировкой и комплектацией
каркасные дома цены karkasnye-doma-msk-pod-kluch.ru .
Индивидуальные каркасные дома, соответствующие всем нормам и стандартам
дома каркасные под ключ https://www.karkasnye-doma-msk-pod-kluch0.ru/ .
Композиции из живых цветов с доставкой день в день
заказать доставку цветов https://www.cvety-s-dostavkoi.ru/ .
В наличии бу запчасти для всех популярных моделей авто
бу запчасти минск https://zapchasti-bu1-minsk.ru .
Каркасный дом от надёжного подрядчика с гарантией результата
каркасные дома спб https://karkasnye-doma-pod-kluch-spb1.ru/ .
Каркасный дом с полной отделкой и всеми коммуникациями — всё включено
строительство каркасных домов под ключ http://karkasnye-doma-pod-kluch-spb1.ru/ .
Каркасный дом с гарантией на строительство и материалы
каркасный дом под ключ в спб каркасный дом под ключ в спб .
Экономия на строительстве без потери качества — каркасный дом
каркасные дома под ключ проекты и цены http://karkasnye-doma-spb-pod-kluch0.ru/ .
Drone light shows that combine art, technology, and emotion
drone show costs https://www.drone0-show.com/ .
Drone light show with up to hundreds of drones and dynamic effects
drone shows https://drone0-show.com/ .
Летние и зимние шины с гарантией лучшей цены
авторезина интернет магазин https://shini-kupit-v-spb.ru/ .
Поиск автозапчастей с помощью авторазборки — быстро и надёжно
авторазборка минск http://www.avtorazborka1-minsk.ru/ .
Персональные условия рефинансирования кредита для клиентов с разным доходом
рефинансирования кредитов других банков https://kapitalinfo-team.ru .
Кредит без отказа на выгодных условиях без скрытых платежей
какой банк дает кредит без отказа https://www.investrost1.ru/ .
Оригинальные бу запчасти без переплаты и посредников
запчасти для иномарок бу http://zapchasti-bu1-minsk.ru/ .
Дом в стиле минимализм — идеальное решение на базе каркасной технологии
строительство каркасных домов спб http://www.karkasnye-doma-spb-pod-kluch.ru/ .
Лизинг коммерческого транспорта с налоговыми преимуществами для бизнеса
лизинг оборудования компании http://www.lizing-kommercheskogo-transporta1.ru/oborudovanie/ .
Каркасные дома с фундаментом, коммуникациями и отделкой под заселение
каркасные дома в москве под ключ стоимость https://karkasnye-doma-msk-pod-kluch.ru/ .
Быстрые и тёплые каркасные дома с гарантией и доставкой материалов
каркасные дома цены http://www.karkasnye-doma-msk-pod-kluch0.ru .
Оригинальные букеты и композиции с доставкой по выгодной цене
цветы в день рождения http://www.cvety-s-dostavkoi.ru/rubric/buket-na-den-rozhdeniya/ .
Drones con luces para shows visuales que cautivan al publico
compañía de espectáculos de drones https://show0-de-drones.com .
Калькулятор досрочного погашения помогает спланировать выплаты без ошибок
кредитный калькулятор с досрочным погашением онлайн кредитный калькулятор с досрочным погашением онлайн .
Новые модели шин и дисков от мировых производителей
магазин шин https://shini-kupit-v-spb.ru .
Способы проверить кредитный рейтинг без очередей и лишних документов
проверить кредитный рейтинг https://dengivperedservice.ru .
Контрактные двигатели с минимальным пробегом и полной диагностикой
купить мотор https://www.kontraktnye-dvigateli1-minsk.ru .
Каркасные дома для дачи и постоянного проживания от 60 м?
каркасные дома санкт петербург https://www.karkasnye-doma-pod-kluch-spb.ru/ .
Выразите себя с помощью печати на футболке
печать на футболках http://www.pechat-na-futbolkah1.ru/ .
Подчеркните стиль компании с помощью сувениров с логотипом
сувенирная продукция suvenirnaya-produktsiya-s-logotipom-1.ru .
Полная комплектация деревянного дома под ключ — от фундамента до мебели
строительство деревянных домов под ключ москва https://derevyannye-doma-pod-klyuch-msk.ru/ .
Как заказать строительство загородного дома с нуля и не переплатить за материалы и услуги
загородное строительство домов https://stroitelstvo-zagorodnyh-domov178.ru .