

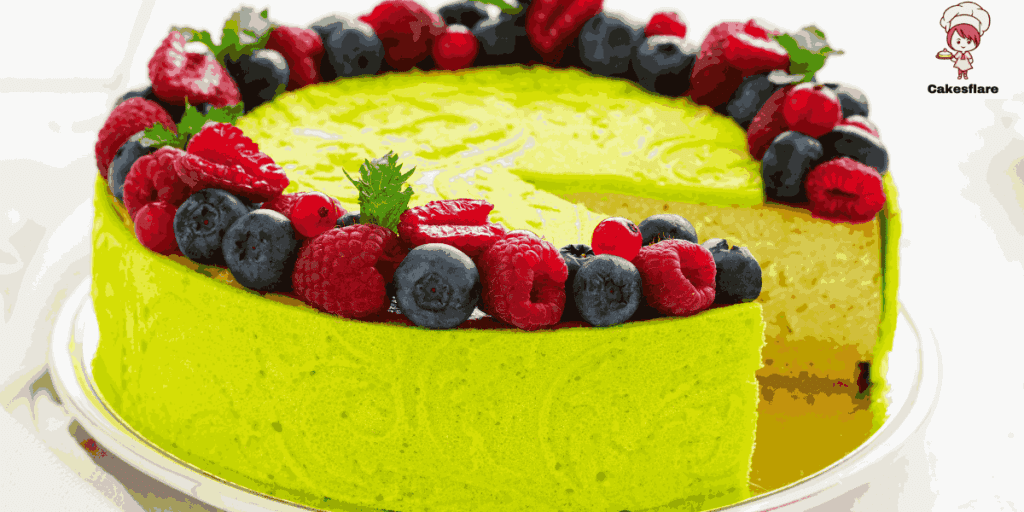
Pistachio Cheesecake: The Secret to Perfect Nutty Flavor!
When making a pistachio cheesecake, getting the right flavor balance is key. While fresh pistachios add a wonderful nuttiness, their natural taste can sometimes fade when mixed with rich ingredients like cream cheese and sour cream. That’s where pistachio extract comes in—it acts as a flavor enhancer, bringing out the nutty, almost buttery notes of the pistachio butter.
I’ve experimented with different brands of pistachio extract, and not all of them taste the same. Some have an artificial undertone, while others bring out the natural richness of the nuts. If you struggle to find a good one, mix vanilla and almond extracts to mimic the effect. Combining one teaspoon vanilla and ½ teaspoon almond can work well in a pinch. However, if you’re aiming for that deep, nutty depth, using a high-quality pistachio extract is worth it.
Adding a few drops of pistachio extract to the filling, and even a little to the crust can make a big difference. The key is balance—too much can overpower the delicate flavors of the cheesecake, while too little might not be noticeable. The right amount enhances the taste without making it taste artificial.

The Secret to a Rich and Creamy Pistachio Cheesecake
You need a generous amount of pistachio butter for a truly indulgent pistachio cheesecake. This ingredient gives the cheesecake its creamy texture and rich nutty taste. Unlike regular chopped pistachios, which add crunch, pistachio butter blends seamlessly into the filling, ensuring each bite is packed with smooth, nutty goodness.
I’ve tested different quantities, and 2/3 cup gives the best flavor. However, if you’re running low on this pricey ingredient—sometimes called “green liquid gold”—you can still get away with ½ cup without sacrificing too much flavor. Making your own is surprisingly simple if you don’t have store-bought pistachio butter. Just blend roasted pistachios in a food processor until they become a smooth, creamy paste. A few drops of pistachio extract can enhance its flavor even more.
One of my favorite tricks is using pistachio butter in multiple cheesecake layers. Mixing it with finely chopped nuts into the crust creates a double dose of pistachio in every bite. Then, folding it into the cheesecake batter adds another level of richness. Finally, a sprinkle of chopped pistachios on top brings it all together for the ultimate pistachio cheesecake experience.
Combining pistachio butter and extract gives you a dessert that’s incredibly creamy and bursting with nutty, buttery goodness.
A Touch of Color: Green Food Coloring (Optional)
When making a pistachio cheesecake, the color of the filling depends on the type of pistachios and pistachio butter used. Some varieties, like Iranian pistachios, are naturally bright, giving the cheesecake a rich green hue. However, store-bought pistachio butter often has a more muted tone, which may result in a cheesecake that appears pale rather than the deep green color people expect.
Adding a few drops of food coloring can help achieve a more vibrant look if you want to enhance the visual appeal. While entirely optional, this little trick makes the cheesecake more impressive and ensures it instantly catches the eye. I usually avoid artificial colors, but when making a dessert for a special occasion, a splash of coloring can elevate the presentation without altering the flavor.
You can also use matcha powder or a touch of spinach extract for a natural boost, but these might slightly affect the taste. Just a few drops of high-quality green food coloring do the job well without overpowering the natural nuttiness of the pistachios. Whether you choose to use coloring or leave it as is, the real focus remains on the rich, nutty flavors that make this cheesecake so vibrant and delicious.
A Perfect Finish: For Toppings
A great pistachio cheesecake deserves the perfect topping to combine all the flavors. The best choice is a smooth layer of sour cream, which adds a subtle tangy contrast to the rich, nutty filling. This creamy layer enhances the texture and gives the cheesecake a polished look.
Here’s how to make the topping extra special:
- Sour Cream – This creates a smooth and creamy layer with a slight tangy flavor.
- Granulated Sugar – Adds the right amount of sweetness and balances the flavor.
- Sea Salt (Pinch) – Enhances the taste by balancing the sweet and nutty notes.
- Chopped Pistachios – Provides a delightful crunch and enhances the nutty richness.
- Garnish – A final sprinkle of pistachios makes the cheesecake look elegant and inviting.
The right combination of toppings can take your cheesecake to the next level. Whether you prefer a smooth and exceptional finish or a more textured bite, these simple elements create the perfect balance.
Step-by-Step Guide to Making the Perfect Pistachio Cheesecake
Creating a pistachio cheesecake is rewarding, resulting in a decadent, creamy, nutty dessert. Following these detailed steps will ensure your cheesecake turns out perfectly every time, with a smooth texture and deep pistachio flavor.
Step 1: Prepare the Crust:
The crust serves as the base of the cheesecake, providing structure and a delicious crunch.
- Preheat the oven to 325°F (160°C).
- In a food processor, pulse cookies and pistachios until they become fine crumbs. The pistachios enhance the nutty flavor of the crust.
- Add melted butter and pulse again until the mixture is evenly moistened. It should resemble damp sand.
- Press the mixture firmly into the bottom and sides of a springform pan (or deep cake pan with a removable bottom). Aim for about 2.5 inches up the sides for an 8-inch pan or 2 inches for a 9-inch pan.
- Bake the crust for 7-8 minutes until slightly golden and set.
- Remove the crust from the oven and let it cool completely before filling.
Step 2: Make the Pistachio Filling:
This creamy filling specializes in cheesecake, bringing out the rich pistachio flavor.
- In a large bowl, beat cream cheese and sugar until completely smooth.
- Add a pinch of salt, pistachio butter, and sour cream for extra richness and creaminess.
- One at a time, crack eggs into the batter, mixing at low speed after each addition. This prevents excess air, which can cause cracks during baking.
- Pour in pistachio extract to deepen the flavor. Mix in one or two drops of green food coloring if you want a brighter green color.
- Scrape down the sides of the bowl and mix one last time to ensure all ingredients are fully incorporated.
Step 3: Bake the Cheesecake
How you bake your cheesecake determines how smooth and crack-free it will be.
- Pour the batter over the cooled crust and spread it evenly.
- Wrap the bottom of the springform pan with foil to prevent leaks if using a water bath.
- Place the cheesecake inside a roasting pan and carefully pour hot water around it to create a water bath. This helps regulate heat, preventing cracks.
- Bake at 325°F (160°C) for 50-60 minutes. The edges should be set, but the center should still slightly jiggle when shaken.
- Turn off the oven and leave the cheesecake inside for 10 more minutes with the door open. This gradual cooling prevents sudden temperature changes that could cause cracks.
Step 4: Add the Sour Cream Topping:
A sour cream topping adds a smooth, slightly tangy contrast to the rich pistachio filling.
- While the cheesecake is still warm, whisk sour cream and sugar together until smooth.
- Pour the topping over the cheesecake and gently spread it into an even layer.
- Return the cheesecake to the oven and bake for 5-8 minutes to set the topping.
- Remove from the oven and let the cheesecake cool at room temperature for 1 hour.
Step 5: Chill the Cheesecake:
Patience is key when making cheesecake. Cooling it properly ensures the best texture and flavor.
- Once the cheesecake has reached room temperature, cover it lightly with plastic wrap and refrigerate for at least 6 hours, preferably overnight.
- Ensure the plastic wrap doesn’t touch the surface of the cheesecake to avoid condensation ruining the texture.
- Before serving, remove the cheesecake from the fridge and let it sit for about 10-15 minutes to soften slightly.
Step 6: Add the Final Touches & Serve:
Now it’s time to make your pistachio cheesecake look as good as it tastes.
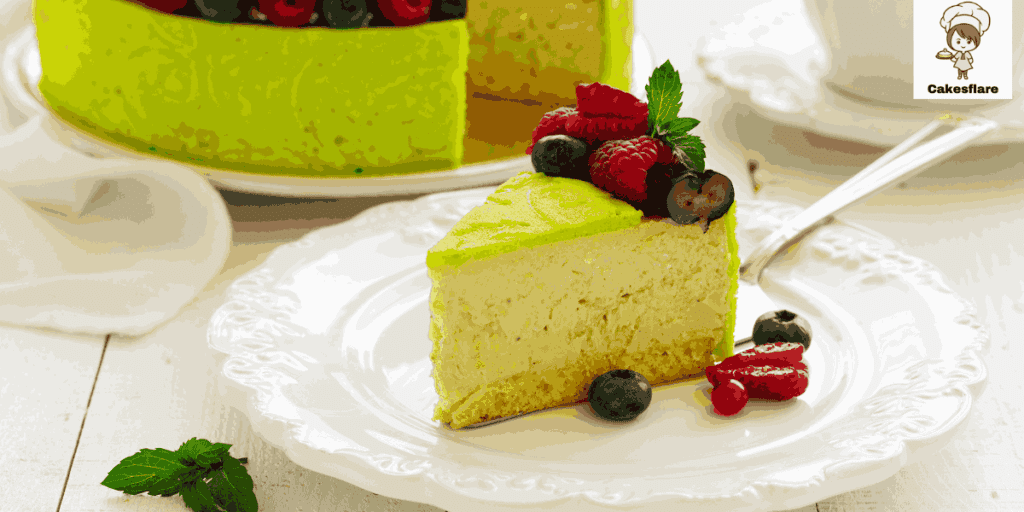
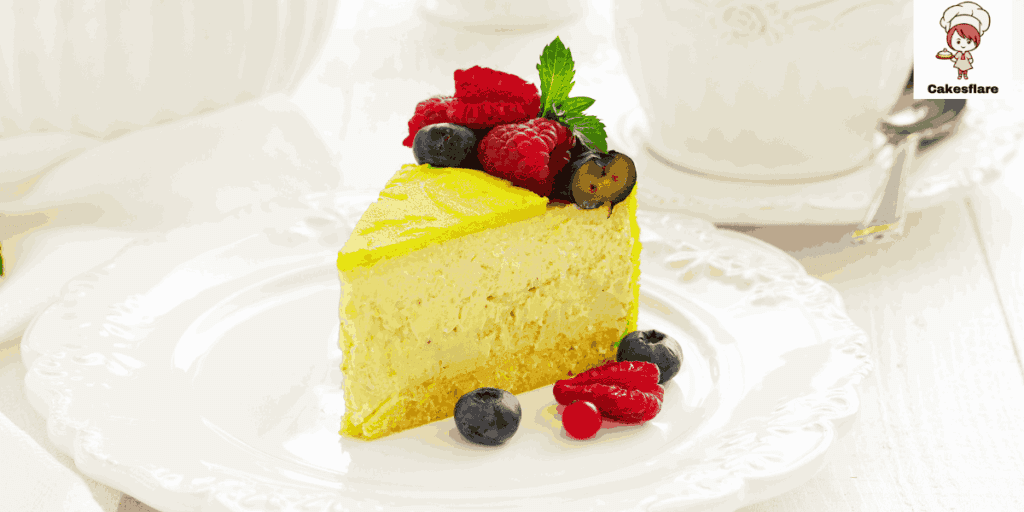
- Just before serving, sprinkle chopped pistachios around the border for extra crunch and a pop of color.
- Use a sharp knife to slice clean wedges, wiping the blade after each cut for the best presentation.
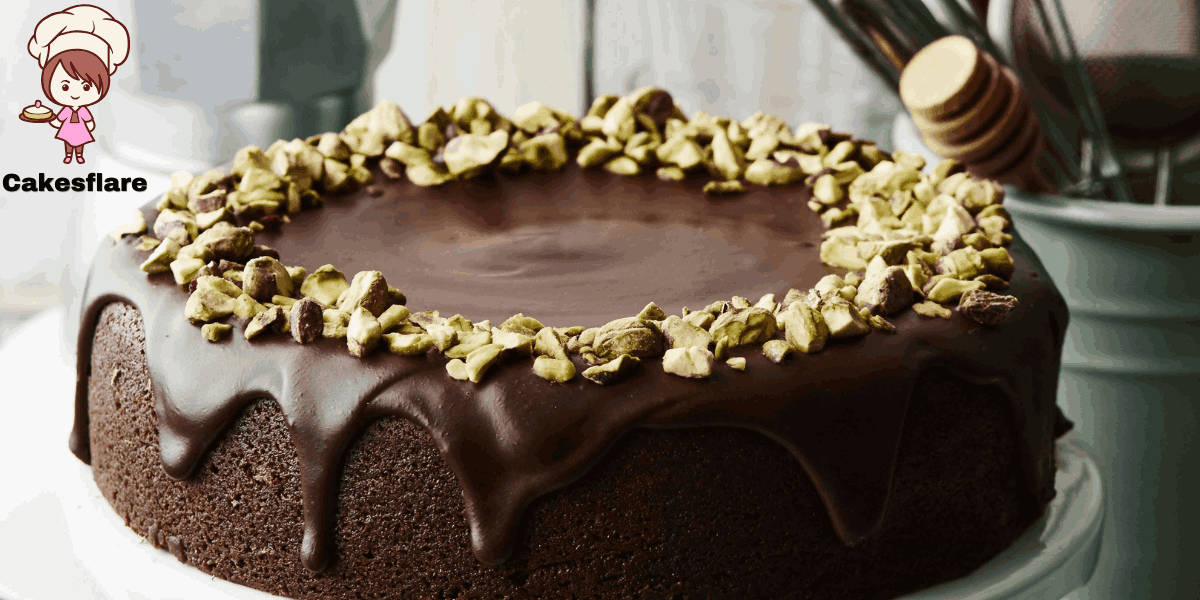
- You can serve the cheesecake as is or add whipped cream, raspberry sauce, or a chocolate ganache drizzle for an extra flavor.
Following these detailed step-by-step instructions, your pistachio cheesecake will turn out smooth, creamy, and rich, making it a guaranteed showstopper at any gathering!
Essential Tips & Tricks for the Perfect Cheesecake
Making a pistachio cheesecake requires patience and techniques to achieve a smooth, creamy, and crack-free dessert. Follow these tips & tricks to ensure your cheesecake turns out perfect every time.
1. Start with Room Temperature Ingredients:
For a creamy and smooth texture, always use room-temperature ingredients. Take your cream cheese, eggs, and sour cream from the fridge at least 1 hour before baking. Cold ingredients don’t mix well and can create lumps in your batter.
2. Use a Food Processor for a Perfectly Smooth Batter:
Instead of a stand or electric mixer, a food processor is the best tool for making cheesecake batter. It prevents excess air from getting trapped, which can cause the cheesecake to puff up and then crack as it cools. If using a mixer, always mix at a low speed to avoid overbeating.
3. Choose the Right Baking Pan:
Ditch the traditional springform pan and use a deep cake pan with a removable bottom instead. These pans are available in 6-inch, 8-inch, and 9-inch sizes, providing a more even bake due to their aluminum construction. A cheesecake pan like this also means you can skip the water bath, making baking easier.
4. Master the Crust for a Perfect Base:
For a firm crust, use a flat-bottomed, straight-sided glass to press the mixture into the bottom and up the sides of the pan. This ensures an even, compact layer that won’t crumble when sliced. Aim for a crust height of about 2.5 inches in an 8-inch pan or 2 inches in a 9-inch pan. This keeps the topping from overflowing.
5. Bake with Care to Prevent Cracks:
The cheesecake is done when the edges are set, but the center is still slightly puffed and has a jiggly consistency, like jello. If it looks liquidy, bake for a few more minutes. Cooling the cheesecake slowly helps prevent cracking, so let it sit in the oven with the door slightly open before transferring it to a cooling rack.
6. Chill for the Best Texture:
Once the cheesecake reaches room temperature, refrigerate it for several hours, preferably overnight. This allows the flavors to meld together, creating a richer taste.
7. Garnish and Serve Like a Pro:
Before serving, sprinkle chopped pistachios around the border for a professional touch. Use a sharp knife to cut slices neatly, wiping them clean between each cut for a flawless presentation.
By following these tips & tricks, your pistachio cheesecake will have the perfect texture, flavor, and presentation, making it a guaranteed hit!
The Best Toppings to Elevate Your Pistachio Cheesecake
A bright white sour cream topping adds a smooth, tangy contrast to pistachio cheesecake, making it even more delicious.
Adding the Topping at the Right Time
Remove the cheesecake from the oven when the edges are raised and puffed but the center is still soft. Let it cool for 10 to 15 minutes, then spread the topping evenly over the warm surface. The heat helps the sour cream melt, creating an even layer.
Achieving the Perfect Texture
Keep sour cream at room temperature for 20 to 30 minutes before using it. If using crème fraîche, keep it chilled as it can become too liquidy when mixed with sugar. The topping should be smooth, spreadable, and not flow over the sides.
Alternative Toppings
Skip the sour cream topping for a green pistachio finish, or try fresh whipped cream, raspberry sauce, or a drizzle of chocolate ganache for extra flavor.
Proper Cooling and Storage for a Perfect Cheesecake
Cooling After Baking:
After removing the cheesecake from the oven for the second time, allow it to cool completely for about 1 to 2 hours. This step is crucial to prevent cracks and ensure a firm texture. Once it has cooled, refrigerate it to set correctly.
Covering to Prevent Condensation:
When refrigerating, cover the top of the pan with plastic wrap, ensuring it does not touch the cheesecake’s surface. This helps condensation collect on the underside of the wrap instead of on the cheesecake, keeping the top smooth and intact.
Adding Pistachios at the Right Time:
For the best texture, wait until just before serving to add the chopped pistachios. If they sit for too long, they might absorb excess moisture and lose their crunch.
These simple steps will ensure your cheesecake stays fresh, firm, and delicious!
Final Thoughts on Pistachio Cheesecake
Pistachio cheesecake is the perfect blend of nutty richness, creamy texture, and a beautifully balanced sweet and tangy flavor. Every bite is a delight from the crunchy pistachio crust to the smooth, velvety filling and the silky sour cream topping.
By following the proper techniques, using high-quality ingredients, and paying attention to cooling and chilling, you can create a show-stopping dessert that is just as stunning as it is delicious. This cheesecake will surely impress whether you prefer it plain, topped with chopped pistachios, whipped cream, raspberry sauce, or chocolate ganache.
Pistachio cheesecake is a recipe worth mastering, Whether for a special occasion or simply to indulge in a decadent treat. Take your time, enjoy the process, and savor every bite of this creamy, nutty masterpiece!
FAQs: Pistachio Cheesecake
1Q: How do I smooth and creamy my pistachio cheesecake?
Always use room-temperature ingredients, including cream cheese, eggs, and sour cream to get a smooth and creamy texture. Mixing at low speed and avoiding over-beating prevents excess air, which can cause cracks. A food processor instead of a mixer can also help achieve a perfectly silky filling.
2Q: Why did my cheesecake crack?
Cracks usually happen due to over-mixing, sudden temperature changes, or overbaking. To prevent this:
- Don’t over-beat the batter after adding eggs.
- Bake the cheesecake in a water bath for even heat distribution.
- Let the cheesecake cool gradually in the oven with the door open before bringing it to room temperature.
3Q: Can I make pistachio cheesecake without a water bath?
Yes! If you don’t want to use a water bath, bake the cheesecake in a deep cake pan with a removable bottom. These pans help conduct heat evenly, reducing the chances of cracking. You can also place a pan of hot water on the bottom oven rack to create steam.
4Q: Can I use store-bought pistachio butter?
Yes! Store-bought pistachio butter works great, but for the best flavor and color, you can make your own by blending roasted pistachios until smooth. Some brands might not be as green as homemade versions, so add a small drop of green food coloring if needed.
5Q: How long should I chill my cheesecake before serving?
For the best texture and flavor, chill the cheesecake for at least 6 hours, preferably overnight. This helps the flavors meld and gives the cheesecake a firm yet creamy consistency.
6Q: When should I add the chopped pistachios on top?
Just before serving, sprinkle chopped pistachios on the cheesecake. If added too early, they can absorb moisture from the topping and become less crunchy.
Pistachio Cheesecake Recipe
Ingredients
| Category | Ingredients | Quantity |
| For the Crust | Graham cracker crumbs/digestive biscuits | 1 ½ cups (180g) |
| Finely chopped pistachios | ½ cup (60g) | |
| Granulated sugar | ¼ cup (50g) | |
| Melted butter | 6 tbsp (85g) | |
| Salt | A pinch | |
| For the Filling | Cream cheese softened | 24 oz (680g) |
| Granulated sugar | 1 cup (200g) | |
| Salt | ½ tsp | |
| Pistachio butter | ¾ cup (180g) | |
| Sour cream | ½ cup (120g) | |
| Pistachio extract | 1 tsp | |
| Vanilla extract | 1 tsp | |
| Eggs | 3 large | |
| Green food coloring (optional) | 2-3 drops | |
| For the Topping | Sour cream | 1 cup (240g) |
| Granulated sugar | ¼ cup (50g) | |
| Vanilla extract | ½ tsp | |
| For Garnish | Chopped pistachios | ¼ cup (30g) |
Instructions
| Step | Instructions |
| 1 | Preheat the oven to 325°F (160°C). Prepare a 9-inch springform pan by greasing it. |
| 2 | Pulse the graham crackers and pistachios in a food processor until fine crumbs form. Add sugar, melted butter, and salt, then pulse until combined. Press the mixture into the bottom and sides of the springform pan. Bake for 8-10 minutes and let it cool. |
| 3 | In a large bowl, beat the cream cheese and sugar until smooth. Add salt, pistachio butter, and sour cream, then mix well. Stir in pistachio extract, vanilla extract, and eggs one at a time, mixing gently. Add green food coloring if desired. |
| 4 | Pour the filling into the cooled crust and smooth the top. Wrap the bottom of the pan with foil to prevent leaks if using a water bath. Place the pan inside a roasting pan and pour hot water around it. |
| 5 | Bake at 325°F (160°C) for 50-60 minutes, or until the edges are set but the center is slightly jiggly. Turn off the oven and let the cheesecake sit inside for 10 minutes with the door open. Let it cool for 1 hour before adding the topping. |
| 6 | Mix sour cream, sugar, and vanilla extract in a small bowl. Spread it evenly over the warm cheesecake. Return it to the oven and bake for 5 minutes to set the topping. |
| 7 | Let the cheesecake cool completely at room temperature, then cover and refrigerate for at least 6 hours or overnight. |
| 8 | Before serving, sprinkle chopped pistachios for garnish. Use a sharp knife to cut clean slices. Enjoy! |
Notes & Tips
- Room Temperature Ingredients: Always use softened cream cheese and room-temperature eggs for a smooth batter.
- Avoid Over-Mixing: Mix at low speed to prevent excess air, which can cause cracks.
- Water Bath Alternative: If you don’t want to use a water bath, place a pan of hot water on the bottom oven rack to create steam.
- Cooling Properly: Let the cheesecake cool slowly in the oven before refrigerating to prevent cracks.
- Wait Before Garnishing: Sprinkle chopped pistachios just before serving to keep them crunchy.
- Storage: Store in an airtight container in the refrigerator for up to 5 days or freeze for up to 2 months.
- Serving Suggestions: Pair with whipped cream, raspberry sauce, or chocolate ganache for extra flavor.

2 Responses