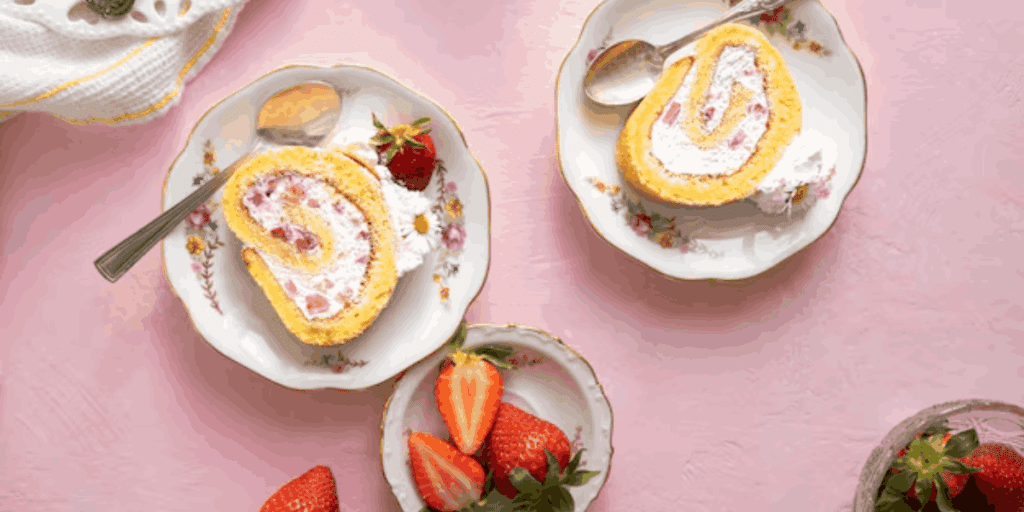
Rediscovering Cassata Ice Cream Cake: A Homemade Delight Worth Savoring!
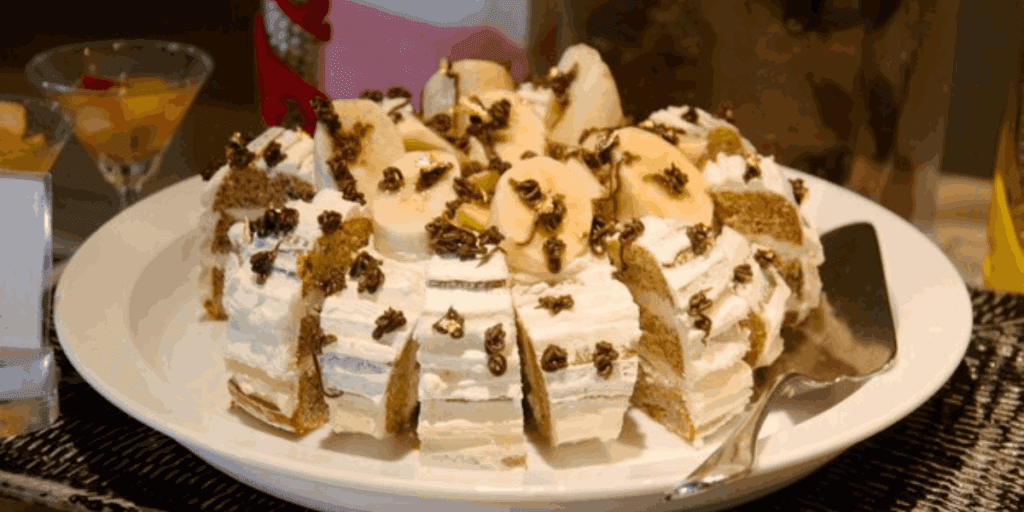
The first time I tasted Cassata Ice Cream Cake, I was captivated by its layers of creamy ice cream, soft sponge cake, and crunchy nuts. It felt like a truly special indulgence. Over time, store-bought versions lost their charm, inspiring me to make my own with fresh ingredients and customized flavors. Recreating this classic at home, sharing it with loved ones, and savoring each bite make the experience unforgettable.
Why I Love Cassata Ice Cream Cake
With summer’s heat, nothing is more refreshing than a cold, creamy dessert. Cassata Ice Cream Cake, a beloved Indian treat, consists of layers of ice cream, sponge cake, and nuts, offering a delightful contrast of textures and flavors. While store-bought versions are widely available, nothing compares to a homemade Cassata, where the quality of ingredients and freshness can be controlled.
Making Cassata at Home
A sudden craving made me create this homemade version using store-bought ingredients for convenience. The classic Indian combination of pistachio, vanilla, and strawberry ice cream remains a favorite, though flavors like chocolate and orange are also excellent alternatives. While some may prefer to skip the cake layer, nuts are essential—their crunch and richness elevate the experience of every bite.
Why Choose Ice Cream Cake for Special Occasions
This homemade Cassata became a highlight of Progressive Eats, a virtual dinner party featuring ice cream-based recipes. Made with fresh fruits and natural ingredients, this colorful, creamy, and nostalgic dessert is perfect for celebrations like Eid, summer gatherings, or any special occasion.
Ingredients for Cassata Ice Cream Cake
- Vanilla Sponge Cake – 1 layer
- Simple Syrup – 1/2 cup (made with sugar, water, and lemon juice)
- Vanilla Ice Cream – 1 cup
- Strawberry Ice Cream – 1 cup
- Pistachio Ice Cream – 1 cup
- Mango Ice Cream – 1 cup (optional)
- Chocolate Ice Cream – 1 cup (optional)
- Vanilla Cheesecake Layer – 1/2 cup (cream cheese, sugar, vanilla, whipped cream)
- Dry Roasted Nuts – 1/2 cup (pistachios, almonds, cashews)

How to Make Cassata Ice Cream Cake
Prepare the Loaf Tin:
Line a loaf tin with foil or cling film for easy removal once frozen. Ensure the lining is smooth and well-set.
Layer the Sponge Cake:
Cut a piece of sponge cake to fit the bottom of your loaf tin. Moisten the cake with a drizzle of simple syrup to enhance flavor and prevent dryness.
Add the First Ice Cream Layer:
Scoop and evenly spread your chosen ice cream (strawberry, vanilla, or pistachio) over the sponge cake layer. Smooth it with a spatula for an even thickness. Freeze for about an hour until set.
Create the Cheesecake Layer:
Once the first ice cream layer is firm, add a cheesecake layer or a softened ice cream layer. Spread evenly for a smooth consistency.
Add Nuts for Texture:
Sprinkle a generous amount of roasted pistachios, almonds, or cashews over the cheesecake or ice cream layer. The nuts add a delightful crunch and enhance the flavor.
Final Ice Cream Layer:
Add another layer of your chosen ice cream (such as vanilla or pistachio) and spread it evenly to cover the nuts and cheesecake layer completely. Smooth it for a neat finish.
Freeze and Set:
Freeze the loaf tin for at least 6 hours or overnight to ensure all layers are appropriately set and firm.
Demold and Slice:
Once the cake is fully set, carefully lift it out using the foil or cling film. Place it on a cutting board and slice it into even pieces. Serve immediately and enjoy the layers of creamy, crunchy goodness!

How to Properly Freeze Cassata Ice Cream Cake
- Freeze between layers for at least one hour to maintain distinct layers.
- Let the ice cream soften slightly before spreading for a smooth texture.
- Cover the cake with cling film to prevent ice crystals from forming.
- Freeze for at least six hours or overnight for the best consistency.
- Let it sit for a few minutes before slicing, and use a sharp knife for clean, precise cuts.
Common Mistakes to Avoid
- Skipping Freezing Between Layers: This can cause the ice cream to blend rather than form distinct layers.
- Not Softening Ice Cream Before Spreading: Hard ice cream can lead to uneven layers and difficulty in assembly.
- Skipping Simple Syrup on the Sponge Cake: This can result in a dry base instead of a soft, moist one.
- Using Low-Quality or Untoasted Nuts: Toasting the nuts enhances their crunch and flavor.
- Cutting the Cake Too Soon: Letting it rest before slicing prevents cracks and ensures clean layers.
- Using a Dull Knife: A sharp knife is essential for maintaining the cake’s beautiful layers when serving.
Challenges of Making Cassata Ice Cream Cake
Gluten-Free Considerations
The sponge cake layer can be challenging for those with gluten intolerance. Instead, consider layering only ice cream and nuts to retain the essence of Cassata while making it more inclusive.
The Search for Perfect Ingredients
Finding unsalted pistachios turned out to be an unexpected challenge. After multiple store visits and last-minute online orders, I improvised—proving that sometimes, last-minute changes lead to even better results!
Notes and Tips
- For a gluten-free version, skip the sponge cake or use an almond flour base.
- Experiment with flavors by swapping traditional ones with chocolate, orange, or coffee ice cream.
- Spoon a few tablespoons of milk over the cake layer before freezing to keep it moist.
- Toast the nuts lightly for extra crunch and a deeper nutty flavor—just be careful not to burn them!
- Let the ice cream soften slightly before layering to create smooth, even spreads.
- Use a sharp knife to cut clean slices and maintain the beautiful layers.
This homemade Cassata Ice Cream Cake is more than just a dessert—it’s a nostalgic trip back to childhood, a delightful treat for special occasions, and a refreshing indulgence for warm summer days. Try making it yourself and experience the joy of crafting this classic at home!
Frequently Asked Questions (FAQs)
Q: Can I make a Cassata Ice Cream Cake without sponge cake?
Ans: You can skip the sponge cake or replace it with a gluten-free alternative, like an almond flour base.
Q: How long should I freeze the cake before serving?
Ans: For best results, freeze it for at least 6 hours or overnight to ensure it sets properly.
Q: What are some alternative ice cream flavors I can use?
Ans: For a unique twist, you can experiment with flavors like chocolate, orange, coffee, or even mango.
Q: How do I ensure clean slices when serving?
Use a sharp knife and let the cake sit for a few minutes before slicing for smooth, even cuts.
Q: Can I prepare Cassata Ice Cream Cake in advance?
Ans: It can be made a few days ahead and stored in the freezer, covered with cling film to prevent freezer burn.
Q: Do I have to toast the nuts?
Ans: Toasting enhances the crunch and flavor, but if you prefer raw nuts, you can use them as they are.
Q: How can I prevent ice crystals from forming?
Ans: Cover the cake tightly with cling film or an airtight container to prevent ice crystals from developing.
Q: Can I make a smaller portion?
Ans: You can halve the ingredients and use a smaller tin for a mini cake version.
Q: What is the best way to store leftovers?
Ans: Keep the leftover cake wrapped in cling film or an airtight container in the freezer for up to a week.
Q: Can I make a dairy-free version?
Ans: Yes, use dairy-free ice cream and a vegan sponge cake to make it dairy-free.
Cassata Ice Cream Cake – A Perfect Recipe
Ingredients
| Ingredient | Quantity |
| Vanilla Sponge Cake | 1 layer |
| Simple Syrup | ½ cup (sugar, water, lemon juice) |
| Vanilla Ice Cream | 1 cup |
| Strawberry Ice Cream | 1 cup |
| Pistachio Ice Cream | 1 cup |
| Mango Ice Cream (optional) | 1 cup |
| Chocolate Ice Cream (optional) | 1 cup |
| Vanilla Cheesecake Layer | ½ cup (cream cheese, sugar, vanilla, whipped cream) |
| Dry Roasted Nuts | ½ cup (pistachios, almonds, cashews) |
Step-by-Step Instructions
| Step | Instruction |
| 1. | Prepare the Base – Line a loaf tin with foil or cling film and place the sponge cake at the bottom. |
| 2. | Moisten the Cake – Drizzle it with simple syrup to keep it soft and flavorful. |
| 3. | Layer the Ice Cream – Spread a thick layer of strawberry ice cream, followed by vanilla, then pistachio, ensuring even layers. |
| 4. | Freeze Between Layers – Place the cake in the freezer for at least 1 hour between each layer to let it set properly. |
| 5. | Add the Cheesecake Layer – Spread a thick cheesecake mixture over the ice cream for a rich, creamy texture. |
| 6. | Top with Nuts – Sprinkle roasted pistachios, almonds, and cashews over the top for a delicious crunch. |
| 7. | Freeze Overnight – Allow the cake to set completely in the freezer for at least 6 hours (overnight is best). |
| 8. | Slice and Serve – Carefully demold, slice, and enjoy the perfect layers of your homemade Cassata Ice Cream Cake! |
Notes and Tips
- Gluten-Free Option – Use an almond flour base or skip the sponge cake.
- Flavor Swap – For variety, try chocolate, orange, or coffee ice cream.
- Moisture Trick – Add milk to keep the cake soft and moist.
- Crunch Factor – Toast nuts lightly for extra flavor and texture.
- Smooth Layers – Let ice cream soften slightly before layering for a softer texture.
- Perfect Slices – Freeze overnight and use a sharp knife for clean, precise cuts.
Enjoy this delightful homemade Cassata Ice Cream Cake, a perfect blend of flavors and textures for any special occasion!